Connecting to RabbitMQ server from Golang with self-signing SSL certificates
27/08/2020 - DOCKER, GO, RABBITMQ
In this example we are going to create a Golang client to connect to our RabbitMQ server through TLS. For that, we will have to create self-signed SSL certificates and share those between the Golang application and the RabbitMQ server.
Create certificates
Create the Dockerfile below in your system and run docker build --no-cache . command. This will output the content of all the required certificate files in terminal. Manually create the files and keep them somewhere for now. For more details, visit Using tls-gen's Basic Profile link.
FROM python:3

RUN git clone https://github.com/michaelklishin/tls-gen tls-gen
RUN cd /tls-gen/basic && make PASSWORD= CN=localhost && make verify
# Without CN=localhost bit, which works just fine too.
# RUN cd /tls-gen/basic && make PASSWORD= && make verify

RUN cat /tls-gen/basic/result/ca_certificate.pem
RUN cat /tls-gen/basic/result/client_certificate.pem
RUN cat /tls-gen/basic/result/client_key.pem
RUN cat /tls-gen/basic/result/server_certificate.pem
RUN cat /tls-gen/basic/result/server_key.pem
Create RabbitMQ server with Docker
Create a directory which is dedicated to the RabbitMQ application as shown below. We are already using the certificates we created in the previous step.
Structure
├── cert
│   ├── ca_certificate.pem
│   ├── server_certificate.pem
│   └── server_key.pem
└── docker-compose.yaml
Composer file
version: "3.4"

services:
  rabbit:
    image: "rabbitmq:3.8.3-management-alpine"
    ports:
      - "5671:5671"   # For TLS
      - "15671:15671" # For UI (HTTP)
    environment:
#      RABBITMQ_DEFAULT_USER: "user"
#      RABBITMQ_DEFAULT_PASS: "pass"
      RABBITMQ_SSL_CACERTFILE: "/cert/ca_certificate.pem"
      RABBITMQ_SSL_CERTFILE: "/cert/server_certificate.pem"
      RABBITMQ_SSL_KEYFILE: "/cert/server_key.pem"
      RABBITMQ_SSL_VERIFY: "verify_peer"
      RABBITMQ_SSL_FAIL_IF_NO_PEER_CERT: "true"
    volumes:
      - "./cert:/cert"
If you enable the user and pass variables above, you will have to use them in the Golang client's connection URL. We will see that later on. For more details on the variables, visit Enabling TLS Support in RabbitMQ page.
Build
$ docker-compose up --build
$ docker-compose ps
Name       State   Ports
------------------------------------------------------------------------------------------------------------
rabbit_1   Up      0.0.0.0:15671->15671/tcp, 15672/tcp, 25672/tcp, 4369/tcp, 0.0.0.0:5671->5671/tcp, 5672/tcp
Verify SSL connection
First of all make sure you have at least OpenSSL 1.1 version in your system. I have two versions installed in my system so I'll use the latest version with the command below.
$ /usr/local/opt/openssl/bin/openssl version -a
OpenSSL 1.1.1f  31 Mar 2020
Below we are testing the server connection with the certificates. The important part is Verification: OK.
$ /usr/local/opt/openssl/bin/openssl s_client -connect localhost:5671 -cert cert/server_certificate.pem -key cert/server_key.pem -CAfile cert/ca_certificate.pem

...
...
...

SSL handshake has read 2299 bytes and written 2449 bytes
Verification: OK
---
New, TLSv1.2, Cipher is ECDHE-RSA-AES256-GCM-SHA384
Server public key is 2048 bit
Secure Renegotiation IS supported
Compression: NONE
Expansion: NONE
No ALPN negotiated
SSL-Session:
    Protocol  : TLSv1.2
    Cipher    : ECDHE-RSA-AES256-GCM-SHA384
    Session-ID: F5D7C47F73210F2FC0DC08EFC37645722D0D7E1AD1824FC5F9473CC2F226056A
    Session-ID-ctx:
    Master-Key: 363BF9B3EC9D1B04E40086FBABD832E272E2B02022352F0B6F88814C04532FB5AA3A75619738733946E947D4EDAD613A
    PSK identity: None
    PSK identity hint: None
    SRP username: None
    Start Time: 1598486146
    Timeout   : 7200 (sec)
    Verify return code: 0 (ok)
    Extended master secret: no
---
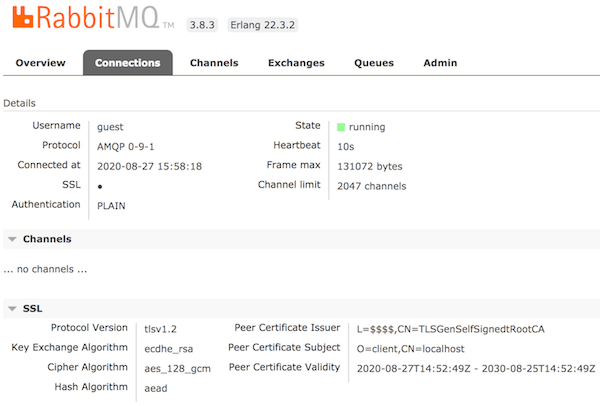
You should also be able to access UI via https://localhost:15671/ using guest:guest credentials.
Note
This applies to MacOS only. Assuming that you have an old OpenSSL version in your system and updated it with brew install openssl command. If you get Warning: Refusing to link: openssl error message after running brew link --force openssl command, you can run commands below.
# Assuming that you now have 1.1 version. Could be something else so change commands below accordingly.

echo 'export PATH="/usr/local/opt/openssl@1.1/bin:$PATH"' >> $HOME/.bash_profile
export LDFLAGS="-L/usr/local/opt/openssl@1.1/lib"
export CPPFLAGS="-I/usr/local/opt/openssl@1.1/include"
Golang client
Check this and this for more details.
func Connection() (*amqp.Connection, error) {
	caCert, err := ioutil.ReadFile("./cert/ca_certificate.pem")
	if err != nil {
		return nil, err
	}

	cert, err := tls.LoadX509KeyPair("./cert/client_certificate.pem", "./cert/client_key.pem")
	if err != nil {
		return nil, err
	}

	rootCAs := x509.NewCertPool()
	rootCAs.AppendCertsFromPEM(caCert)

	tlsConf := &tls.Config{
		RootCAs:      rootCAs,
		Certificates: []tls.Certificate{cert},
		ServerName:   "localhost", // Optional
	}

	return amqp.DialTLS("amqps://localhost:5671/", tlsConf)
	// If you used credentials in docker, we did not!
	// return amqp.DialTLS("amqps://user:pass@localhost:5671/", tlsConf)
}
If you want to optionally handle certificates, you can use this version instead.
# Example URL set:
# amqps://username:password@host:post/vhost
# amqps://username:password@host:post/
# amqps://host:post/vhost
# amqps://host:post/

func Connection(url string, caCert, clientCert, clientKey []byte) (*amqp.Connection, error) {
	tlsCnf := &tls.Config{}

	if caCert != nil {
		tlsCnf.RootCAs = x509.NewCertPool()
		tlsCnf.RootCAs.AppendCertsFromPEM(caCert)
	}

	if cert, err := tls.X509KeyPair(clientCert, clientKey); err == nil {
		tlsCnf.Certificates = append(tlsCnf.Certificates, cert)
	}

	return amqp.DialConfig(url, amqp.Config{TLSClientConfig: tlsCnf})
}
UI