Kendinden imzalı SSL sertifikaları ile Golang'dan RabbitMQ sunucusuna bağlanma
27/08/2020 - DOCKER, GO, RABBITMQ
Bu örnekte, RabbitMQ sunucumuza TLS aracılığıyla bağlanmak için bir Golang istemcisi oluşturacağız. Bunun için kendinden imzalı SSL sertifikaları oluşturmamız ve bunları Golang uygulaması ile RabbitMQ sunucusu arasında paylaşmamız gerekecek.
Sertifikalar oluşturun
Sisteminizde aşağıdaki Dockerfile'ı oluşturun ve docker build --no-cache . komutunu çalıştırın. Bu, gerekli tüm sertifika dosyalarının içeriğini terminalde çıkaracaktır. Dosyaları manuel olarak oluşturun ve şimdilik bir yerde saklayın. Daha fazla bilgi için Using tls-gen's Basic Profile linkini ziyaret edin.
FROM python:3

RUN git clone https://github.com/michaelklishin/tls-gen tls-gen
RUN cd /tls-gen/basic && make PASSWORD= CN=localhost && make verify
# Without CN=localhost bit, which works just fine too.
# RUN cd /tls-gen/basic && make PASSWORD= && make verify

RUN cat /tls-gen/basic/result/ca_certificate.pem
RUN cat /tls-gen/basic/result/client_certificate.pem
RUN cat /tls-gen/basic/result/client_key.pem
RUN cat /tls-gen/basic/result/server_certificate.pem
RUN cat /tls-gen/basic/result/server_key.pem
Docker ile RabbitMQ sunucusu oluşturun
Aşağıda gösterildiği gibi RabbitMQ uygulamasına ayrılmış bir klasör oluşturun. Bir önceki adımda oluşturduğumuz sertifikaları kullanmaya başlıyoruz.
Yapı
├── cert
│   ├── ca_certificate.pem
│   ├── server_certificate.pem
│   └── server_key.pem
└── docker-compose.yaml
Composer dosyası
version: "3.4"

services:
  rabbit:
    image: "rabbitmq:3.8.3-management-alpine"
    ports:
      - "5671:5671"   # For TLS
      - "15671:15671" # For UI (HTTP)
    environment:
#      RABBITMQ_DEFAULT_USER: "user"
#      RABBITMQ_DEFAULT_PASS: "pass"
      RABBITMQ_SSL_CACERTFILE: "/cert/ca_certificate.pem"
      RABBITMQ_SSL_CERTFILE: "/cert/server_certificate.pem"
      RABBITMQ_SSL_KEYFILE: "/cert/server_key.pem"
      RABBITMQ_SSL_VERIFY: "verify_peer"
      RABBITMQ_SSL_FAIL_IF_NO_PEER_CERT: "true"
    volumes:
      - "./cert:/cert"
Yukarıdaki kullanıcı ve şifreyi etkinleştirirseniz, bunları Golang istemcisinin bağlantı URL'sinde kullanmanız gerekecektir. Bunu daha sonra göreceğiz. Değişkenlerle ilgili daha fazla bilgi için Enabling TLS Support in RabbitMQ linkini ziyaret edin.
Kurulum
$ docker-compose up --build
$ docker-compose ps
Name       State   Ports
------------------------------------------------------------------------------------------------------------
rabbit_1   Up      0.0.0.0:15671->15671/tcp, 15672/tcp, 25672/tcp, 4369/tcp, 0.0.0.0:5671->5671/tcp, 5672/tcp
SSL bağlantısını doğrulayın
Öncelikle, sisteminizde en azından OpenSSL 1.1 sürümüne sahip olduğunuzdan emin olun. Sistemimde kurulu iki sürüm var, bu yüzden aşağıdaki komutla en son sürümü kullanacağım.
$ /usr/local/opt/openssl/bin/openssl version -a
OpenSSL 1.1.1f  31 Mar 2020
Aşağıda sunucu bağlantısını sertifikalarla test ediyoruz. Önemli olan Verification: OK kısmıdır.
$ /usr/local/opt/openssl/bin/openssl s_client -connect localhost:5671 -cert cert/server_certificate.pem -key cert/server_key.pem -CAfile cert/ca_certificate.pem

...
...
...

SSL handshake has read 2299 bytes and written 2449 bytes
Verification: OK
---
New, TLSv1.2, Cipher is ECDHE-RSA-AES256-GCM-SHA384
Server public key is 2048 bit
Secure Renegotiation IS supported
Compression: NONE
Expansion: NONE
No ALPN negotiated
SSL-Session:
    Protocol  : TLSv1.2
    Cipher    : ECDHE-RSA-AES256-GCM-SHA384
    Session-ID: F5D7C47F73210F2FC0DC08EFC37645722D0D7E1AD1824FC5F9473CC2F226056A
    Session-ID-ctx:
    Master-Key: 363BF9B3EC9D1B04E40086FBABD832E272E2B02022352F0B6F88814C04532FB5AA3A75619738733946E947D4EDAD613A
    PSK identity: None
    PSK identity hint: None
    SRP username: None
    Start Time: 1598486146
    Timeout   : 7200 (sec)
    Verify return code: 0 (ok)
    Extended master secret: no
---
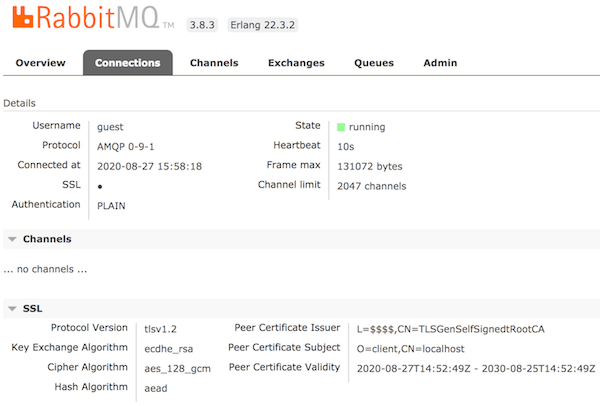
Kullanıcı arayüzüne guest:guest kimlik bilgileri kullanarak https://localhost:15671/ adresinden erişebilmelisiniz.
Not
Bu yalnızca MacOS için geçerlidir. Sisteminizde eski bir OpenSSL sürümüne sahip olduğunuzu ve bunu brew install openssl komutuyla güncellediğinizi varsayıyorum. brew link --force openssl komutunu çalıştırdıktan sonra Warning: Refusing to link: openssl hata mesajını alırsanız, aşağıdaki komutları çalıştırabilirsiniz.
# Assuming that you now have 1.1 version. Could be something else so change commands below accordingly.

echo 'export PATH="/usr/local/opt/openssl@1.1/bin:$PATH"' >> $HOME/.bash_profile
export LDFLAGS="-L/usr/local/opt/openssl@1.1/lib"
export CPPFLAGS="-I/usr/local/opt/openssl@1.1/include"
Golang istemcisi
Daha fazla bilgi için bu ve bu linki ziyaret ediniz.
func Connection() (*amqp.Connection, error) {
	caCert, err := ioutil.ReadFile("./cert/ca_certificate.pem")
	if err != nil {
		return nil, err
	}

	cert, err := tls.LoadX509KeyPair("./cert/client_certificate.pem", "./cert/client_key.pem")
	if err != nil {
		return nil, err
	}

	rootCAs := x509.NewCertPool()
	rootCAs.AppendCertsFromPEM(caCert)

	tlsConf := &tls.Config{
		RootCAs:      rootCAs,
		Certificates: []tls.Certificate{cert},
		ServerName:   "localhost", // Optional
	}

	return amqp.DialTLS("amqps://localhost:5671/", tlsConf)
	// If you used credentials in docker, we did not!
	// return amqp.DialTLS("amqps://user:pass@localhost:5671/", tlsConf)
}
İsteğe bağlı olarak sertifikaları işlemek istiyorsanız, yukarıdakinin yerine bu sürümü kullanabilirsiniz.
# Example URL set:
# amqps://username:password@host:post/vhost
# amqps://username:password@host:post/
# amqps://host:post/vhost
# amqps://host:post/

func Connection(url string, caCert, clientCert, clientKey []byte) (*amqp.Connection, error) {
	tlsCnf := &tls.Config{}

	if caCert != nil {
		tlsCnf.RootCAs = x509.NewCertPool()
		tlsCnf.RootCAs.AppendCertsFromPEM(caCert)
	}

	if cert, err := tls.X509KeyPair(clientCert, clientKey); err == nil {
		tlsCnf.Certificates = append(tlsCnf.Certificates, cert)
	}

	return amqp.DialConfig(url, amqp.Config{TLSClientConfig: tlsCnf})
}
UI