Install and use Beanstalk in Ubuntu
08/03/2017 - BEANSTALK, LINUX
Similar to RabbitMQ, Beanstalkd is a work queue server that runs time-consuming tasks behind the scene. It receives messages/jobs from producers/senders and processes them with consumers/receivers. For more information visit Beanstalk, FAQ and Options pages.
Elements
Its elements function in a similar way to other queuing systems but may use different terms. Tubes(Queues), Jobs(Messages), Producers(Senders) and Consumers(Receivers).
Install server
$ sudo apt-get update
$ sudo apt-get install beanstalkd

$ beanstalkd -v
beanstalkd 1.9
Available commands
$ sudo service beanstalkd {start|stop|force-stop|restart|force-reload|status}
Config file
These will give you the basic config info.
$ cat /etc/default/beanstalkd
$ cat /etc/init.d/beanstalkd # For full details (Try not to touch this)
These will give you the detailed server info.
$ telnet 127.0.0.1 11300
Trying 127.0.0.1...
Connected to localhost.
Escape character is '^]'.

# Type 'stats' to see very valuable info
Use the following line for persistent job storage. When enabled, beanstalkd will write all jobs to a binlog folder /var/lib/beanstalkd. If the power goes out, you can restart beanstalkd with the same option and it will recover the contents of the log but boot might take long time depending on how many log files exist. Beware, this feature takes up a lot of disk space so for example one very simple job takes about 10MB space.
BEANSTALKD_EXTRA="-b /var/lib/beanstalkd"
Use the following line to enable auto startup during system boot.
START=yes
Use the following line if you need to increase job size in bytes. The default is 65KB. I suggest, keep the jobs size as small as possible.
BEANSTALKD_EXTRA="-z 524280" # 524KB
Job recovery
First of all your config must be set as below. If you don't have persistence enabled, you will never recover your jobs which can be a disaster.
#/etc/default/beanstalkd
BEANSTALKD_LISTEN_ADDR=127.0.0.1
BEANSTALKD_LISTEN_PORT=11300

# Mark jobs as persistent
BEANSTALKD_EXTRA="-b /var/lib/beanstalkd"
# Start beanstalkd server at service/os boot or beanstalkd start/restart
START=yes
This is the behaviour of job persistence feature.
- Server is running.
- There is no jobs in tube.
- The
/var/lib/beanstalkdis empty. - The server is restarted.
- There is still no jobs in tube.
- The
/var/lib/beanstalkdis still empty. - Put 1 job in tube.
- The
/var/lib/beanstalkdis still empty. - The server is restarted.
- The
/var/lib/beanstalkdhas 1 log file. - The server is restarted.
- The
/var/lib/beanstalkdhas 2 log files.
So what happens here is that, beanstalk marks jobs as "persistent" but doesn't create log files in the binlog directory immediately. It only creates them when the server is restarted and puts the jobs into relevant queues by reading the log files. The good thing about this is, you can delete log files because beanstalk has already read them and put them back into queues. Remember, if you don't process those recovered jobs after deleting the log files, you will lose them after next restart so make sure that you processed them before deleting them.
Install web interface
Composer command below will install Beanstalk Console under /var/www/html/beanstalk_console path. For more information visit Beanstalk Console page.
$ composer create-project ptrofimov/beanstalk_console -s dev /var/www/html/beanstalk_console
Running
Check with $ sudo service beanstalkd status to see if the server is already running. If it is not running, start it with $ sudo service beanstalkd start command.
Accessing web interface
Switch to the host directory.
$ cd /var/www/html/beanstalk_console
Find your server's IP address. I'm on vagrant so I use 192.168.50.10 to access my server from host machine's browser.
$ hostname -I
10.0.2.15 192.168.50.10
Running the server.
beantstalk_console$ php -S 192.168.50.10:7654 -t public
PHP 5.5.9-1ubuntu4.20 Development Server started at Tue Mar  7 21:11:14 2017
Listening on http://192.168.50.10:7654
Document root is /var/www/html/beantstalk_console/public
Press Ctrl-C to quit.
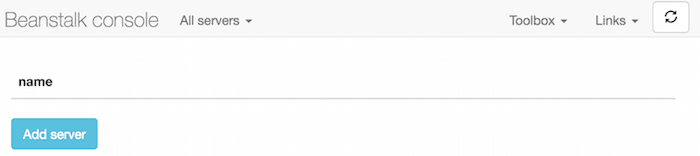
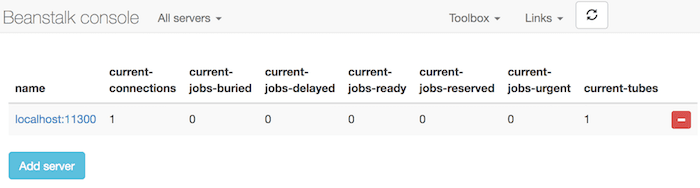
Access GUI from host machine's browser by going to http://192.168.50.10:7654. Click "Add server" button. Don't change already filled boxes so stick with the default setting of localhost:11300 and hit "Add server" button.